I was standing in the hardwood aisle of the Rockler over in Maplewood a few months ago, clutching a single board of 8/4 black walnut like it was a fragile server blade during a midnight database migration. At nearly eighteen bucks a board foot, this piece of timber cost more than my first three IKEA desks combined. For a guy whose previous claim to fame was a bookshelf that leaned four degrees to the left, this felt like a high-stakes gamble.
Just a quick heads-up before we get into the sawdust: This site uses affiliate links. If you buy something through these links, I earn a commission at no extra cost to you. I only recommend plans and tools like the ones from TedsWoodworking that I actually have in my own garage shop. Full transparency, always.
The Logic of the 'Hello World' Project
In my day job as an IT project manager, mistakes are usually reversible. You have backups, staging environments, and 'undo' buttons. In woodworking, once you run that walnut through the table saw, the 'undo' button is a bottle of Titebond III and a prayer. I decided earlier this year that if I was going to stop being the guy who just 'owned tools' and start being the guy who 'made things,' I needed a win. I needed a project with a high success probability but enough technical debt to keep it interesting.
An end-grain cutting board is the 'Hello World' of serious woodworking. It looks incredibly complex—all those alternating wood grains and checkerboard patterns—but it’s actually just a series of repetitive, logical steps. It’s an algorithm in timber. You rip, you glue, you cross-cut, you flip, and you glue again. As an engineer-type, this appealed to my need for a structured process. If I followed the logic, the output should be successful. Theoretically.
The problem with my previous projects wasn't my enthusiasm; it was my 'winging it' philosophy. I’d see a photo on Instagram and think, 'Yeah, I can eyeball that.' Narrative arc spoiler: I could not. This time, I actually invested in some documentation. I’ve been using TedsWoodworking for a while now because I realized my spatial reasoning is roughly equivalent to a confused golden retriever. Having a cut list that accounted for the 'kerf'—the width of the saw blade—changed the entire game. If you’re still working on a rickety bench, you might want to check out my guide on building a mobile tool cart to get your space organized before you tackle a big glue-up.
Observation 1: The 'Kerf' is the Woodworking Version of Latency
In IT, you ignore latency at your peril. In woodworking, the saw blade eats about an eighth of an inch of your material every time you make a cut. If you make ten cuts, you’ve lost over an inch of wood. My first attempt at a cutting board (a scrap pine experiment) ended up two inches shorter than planned because I didn't account for the 'tax' the blade takes. Using a detailed blueprint that actually listed the 'final' versus 'rough' dimensions was the first time I felt like I was actually managing a project rather than just creating expensive shavings.
I also learned that my old miter saw was about as accurate as a weather forecast. I eventually had to build a dedicated miter saw station just to ensure my cross-cuts were actually ninety degrees. Without that ninety-degree accuracy, your cutting board will look more like a trapezoid than a rectangle, and no amount of wood filler can hide that kind of shame.
The Glue-Up: A High-Stakes Race Against Chemistry
If you want to experience true stress, try applying wood glue to twenty individual strips of walnut and maple while the humidity in a Minnesota garage is climbing. You have a very narrow window before the glue starts to 'skin over.' It’s exactly like trying to push a major code update to production five minutes before a holiday weekend starts. Everything has to be lined up perfectly, or the whole system crashes.
I laid out my strips, applied the glue, and started tightening the clamps. This is where I made my big mistake of the project: I over-tightened. I was so worried about gaps that I squeezed almost all the glue out of the joints—what the pros call a 'starved joint.' I watched as the wood bowed slightly under the pressure. I had to back off, realign, and wipe away the beads of glue while muttering things my neighbors probably shouldn't have heard. It was messy, my hands were sticky, and for a solid twenty minutes, I was convinced I’d just turned eighty bucks of walnut into a very expensive campfire starter.
One thing that helped me keep my sanity during the 'panic phase' was having a clear set of steps to fall back on. I usually keep a tablet on my workbench with the TedsWoodworking plans pulled up. When the glue starts drying and your brain starts melting, having a 'single source of truth' for your assembly sequence is the only thing that prevents total project failure.
The Sanding Marathon: 80 Grit to 320 Grit
After the glue dried and I scraped off the excess—a process that feels remarkably like cleaning up a messy database—I was left with a block of wood that looked... okay. It was flat-ish, but it was ugly. This is the stage where most hobbyists, myself included, usually give up or rush.
I spent what felt like an eternity sanding that board. 80 grit, 120 grit, 150 grit, 180 grit, 220 grit, and finally 320. It is a meditative, soul-crushing, and ultimately rewarding process. It’s like optimizing a slow SQL query—you keep refining and refining until the friction just disappears. I found that my old orbital sander from the bargain bin wasn't cutting it; it was leaving swirl marks that looked like tiny crop circles. I eventually had to borrow a better unit from a neighbor who actually knows what he’s doing.
Pro-tip for the suburban woodworker: Wear a respirator. Not a paper mask—a real respirator. I spent the first week of my woodworking journey coughing up oak dust, which my wife pointed out was a 'very stupid way to spend a Saturday.' She wasn't wrong. Since I moved my shop into the garage, I've had to get serious about dust collection on a budget, or at least opening the door and using a leaf blower to clear the 'evidence' before she gets home from work.
The Mineral Oil Reveal: The 'Deployment' Moment
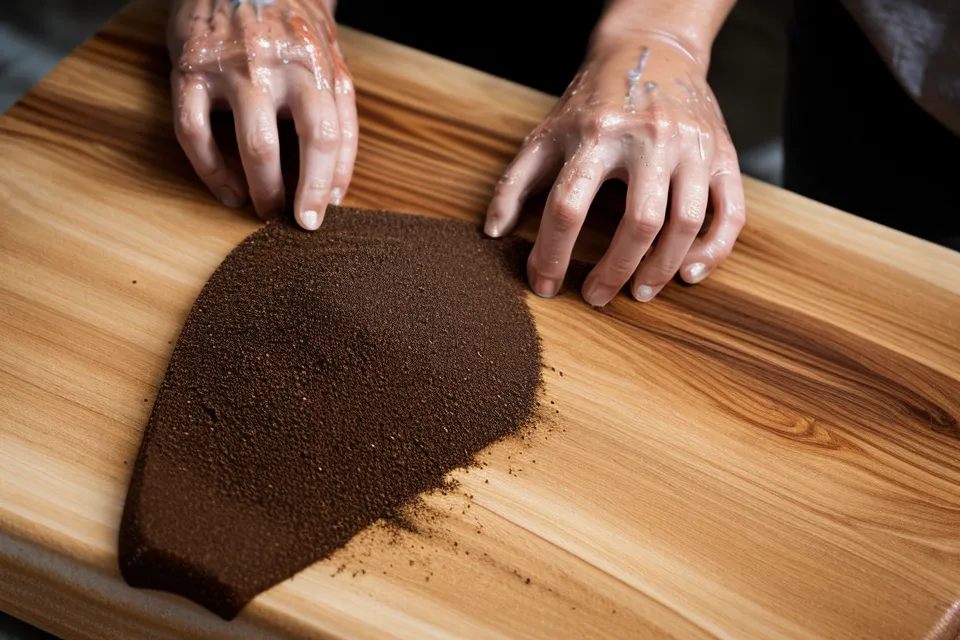
This is the moment every woodworker lives for. After all the measuring, the stressful glue-ups, and the hours of sanding, you finally apply the finish. In the case of a cutting board, it’s food-grade mineral oil.
As I wiped the oil across the dry, dusty walnut, the wood 'popped.' The dull grey transformed into a deep, chocolatey brown. The maple strips turned a creamy white. The end-grain soaked up the oil like a thirsty sponge, revealing a geometric pattern that actually looked... professional. I stood there in my sawdust-covered polo shirt and realized I hadn't just built a board. I had followed a plan, managed the variables, and produced something that didn't suck.
Observations on the 'Final Build':
- Measurement is a Lie: Your tape measure is an approximation. Always use the same tape measure for the whole project. Mixing a Stanley and a Milwaukee tape measure is a recipe for being a sixteenth of an inch off, which is basically a mile in woodworking.
- The Router is a Chainsaw in a Prom Dress: I tried to add a 'juice groove' to the board. The router caught a bit of grain and kicked back, nearly taking a chunk out of the board. I decided right then that 'minimalist' was a better aesthetic and skipped the groove. I'll save the complex routing for when I build my DIY Adirondack chairs later this summer.
- Wife Approval Factor (WAF): This is the ultimate metric. When I brought the board inside, my wife didn't ask 'What is that?' or 'Is it supposed to be that shape?' She asked, 'Can we use this for the charcuterie board on Sunday?' Success achieved.
Is It Worth the Sawdust?
If you look at the economics, I spent about eighty bucks on wood, twenty on a new router bit, and a few weekends of labor. I could have bought a similar board at a high-end kitchen store for a hundred and twenty. From a pure ROI perspective, it’s a disaster. But from a mental health perspective? It’s the best investment I’ve made since I started working from home full-time. There is something profoundly satisfying about creating a physical object that will likely outlast my current laptop.
If you're sitting in your garage looking at a pile of 2x4s and wondering where to start, don't start with a bookshelf. Start with something small that requires precision. Grab some actual blueprints—I swear by TedsWoodworking because having 16,000 plans means I can always find a project that fits my current (limited) skill level. If you're more into the 'outdoor' vibe, My Shed Plans is also a solid resource for bigger structural stuff. Just stop winging it. Your sanity and your scrap pile will thank you.
I’m currently eyeing a coffee table project next. I’ve already bought the wood, and I’ve only measured it three times so far. Wish me luck—or at least wish that my table saw blade stays sharp and my glue stays wet just long enough for the next big assembly.