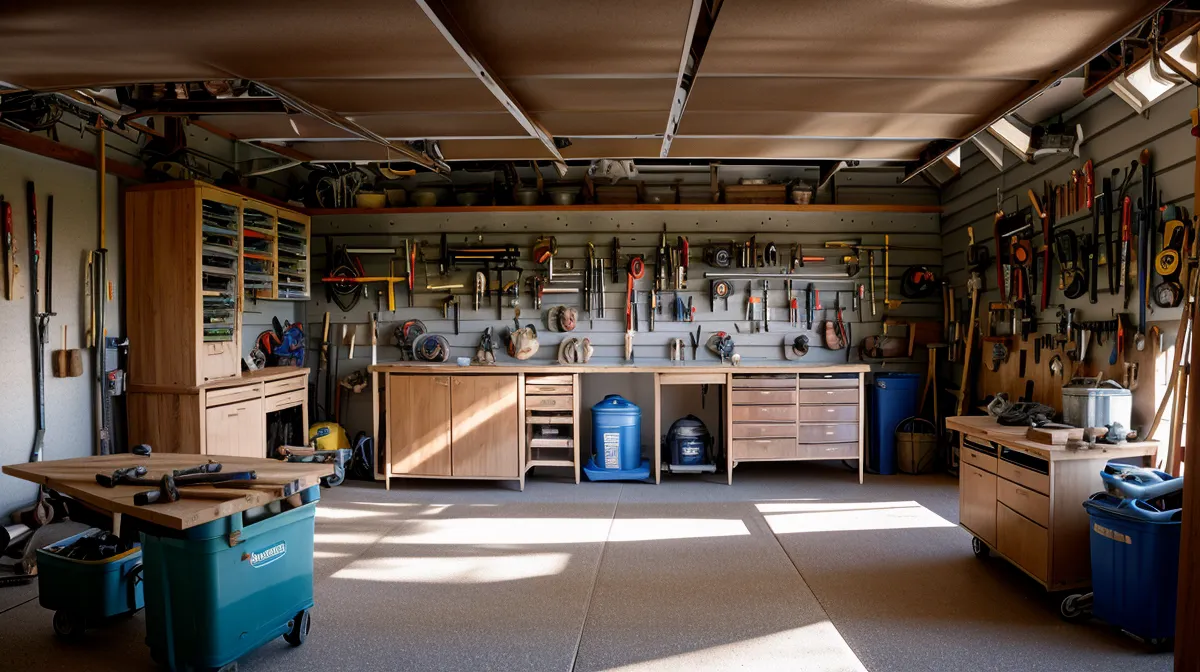
One humid evening last summer, I tripped over my table saw's power cord while trying to squeeze past the lawnmower. As I stumbled toward my lopsided bookshelf—the one that started this whole obsession back in 2020—I realized my half-garage workshop had become a cluttered obstacle course. It was more dangerous than productive. In the world of IT, we call this 'resource contention.' In my Minneapolis garage, it was just a recipe for a broken ankle and a lot of swearing.
My workshop occupies exactly half of our standard 20-foot by 20-foot garage. That’s 400 square feet of total space, but once you account for the trash bins, the snowblower, and my wife’s SUV, my actual 'development environment' shrinks to a sliver of concrete. For years, I’ve dealt with 'The Shuffle.' Every time I wanted to use the miter saw, I had to move the shop vac and two bins of scrap wood. To use the planer, I had to relocate the drill press. It was like trying to run a high-performance database on a fragmented hard drive.
By late last October, the friction of just getting started on a project was killing my motivation. My IT project manager brain was screaming for a workflow optimization, but my DIY skills were still stuck in that 'hope this is level' phase. I needed a mobile tool cart, but not just any cart. I needed something that could hold my lunchbox planer and a bench grinder but still tuck into the corner so the car could actually fit inside before the first Minnesota blizzard hit.
The Architecture: Searching for a Modular Plan
Most of the mobile workbench plans I found online were massive. They looked like aircraft carriers—beautiful, but entirely impractical for a guy who has to share floor space with a bag of ice melt and a lawnmower. I didn't want a heavy, full-sized workbench-style cart. I wanted something modular and lightweight. My logic was simple: if I built a massive 'all-in-one' station, it would become its own permanent obstacle. Instead, I wanted a design that forced me to store only the tools I actually use weekly, keeping the footprint small and the mobility high.
I started digging through the database at Teds Woodworking. I’ve had the membership for a while now—it cost me about $67 for the access to 16,000 plans—and it’s usually my first stop when I need to visualize a build. I wasn't looking for a masterpiece; I was looking for a 'minimum viable product' that wouldn't collapse under the weight of a cast-iron tool. I eventually settled on a modular cart design that featured a narrow profile and adjustable shelving. It looked manageable for a guy who still occasionally forgets to account for the 1/8-inch kerf of a standard table saw blade.
The plan called for basic plywood construction, which is the 'Hello World' of woodworking materials. I headed to the local big-box store and picked up a single 4-foot by 8-foot sheet of 3/4-inch maple ply. I’ve learned the hard way that trying to save ten bucks on construction-grade sheathing just leads to splinters and regret later on.
The 'January Freeze' Logic Error
Woodworking in a Minnesota garage during a cold snap in January is an exercise in stubbornness. I have a small space heater that hums constantly, but it only really warms the air about three feet in front of the coils. One Saturday morning, with the temperature hovering well below zero outside, I was deep into the assembly phase. I was feeling confident—too confident. I was applying what I call Agile Woodworking principles, trying to iterate quickly through the carcass assembly.
That’s when the 'system crash' happened. I was cutting the dadoes for the internal shelving. I measured, I marked, and I ran the boards through the table saw. But when I went to dry-fit the pieces, I found myself staring at a 1/4-inch gap in my dado joint. I realized I hadn't calibrated my table saw fence after moving it to clear a path for the shop vac. In my haste to stay warm, I’d skipped the basic 'unit testing' of checking my fence alignment.
It was a classic failure. I stood there in the freezing air, the smell of fresh sawdust and cold Minnesota air hitting the shop vac's exhaust while the garage heater hummed its taunting little tune. I’d effectively turned twenty dollars worth of maple plywood into expensive kindling. In the past, this is where I would have walked inside and scrolled through my phone for two hours in defeat. But instead, I went back to the digital 3D view provided in the plans. Seeing the assembly sequence rendered in three dimensions helped me spot exactly where my shelf placement deviated from the structural requirements. I realized I could salvage the side panels by flipping them and using the 'mistake' side as the interior, hidden by the drawers.
Assembly and Optimization
By one Saturday morning in March, the weather had finally broken enough that I could leave the garage door cracked open an inch for ventilation. The assembly of a mobile cart is all about the foundation. If the base isn't square, the drawers will never slide right, and the whole thing will wobble like a table at a cheap diner. I spent an extra hour ensuring the base frame was perfectly diagonal-to-diagonal equal.
For the mobility aspect, I didn't skimp. I bought four heavy-duty industrial casters with a 250 lbs capacity each. Over-engineering the load-bearing components is a habit I brought over from my day job. If the requirements say the system needs to handle 100 concurrent users, you build it for 500. If the cart needs to hold a 50-pound planer, you buy casters that won't develop flat spots if you leave it sitting for a month.
I also decided to stick to my 'modular' guns. Instead of permanent shelves, I used a pin-hole system. This allows me to adjust the height of the storage based on whatever tool I’m currently obsessing over. Right now, it holds my planer on top and my bench grinder on the middle shelf. The bottom is reserved for a small bin of offcuts. It’s a lean system. If a tool hasn't been touched in three months, it doesn't get a spot on the cart. It goes into 'cold storage' in the rafters.
The Final Roll-Out
I finished the last coat of polyurethane in early April. I know some guys say you don't need a finish on shop furniture, but I’ve found that bare plywood in a humid garage eventually looks like it was recovered from a shipwreck. Plus, wiping down sawdust is a lot easier on a smooth surface. I gave the wood glue a full 24 hours to reach full cure strength before I actually loaded the tools. Patience is not my strongest suit, but structural integrity is a non-negotiable requirement.
Rolling the finished, heavy-duty cart across the garage floor for the first time was incredibly satisfying. It doesn't wobble, the casters lock tight, and for the first time in three years, I can find my speed square in under five seconds. My garage doesn't feel like a cluttered basement anymore; it feels like a functional shop. The cart fits perfectly into a 24-inch gap next to the water heater when it’s not in use.
Looking back at the lopsided bookshelf that started this journey, the progress is visible in the joints. There are still mistakes—if you look closely at the back panel, you can see where I mis-drilled a hole and filled it with a mix of sawdust and glue—but those are just 'comments in the code.' They don't affect the performance. If you’re looking to maximize a small space, I highly recommend starting with a mobile project like this. It’s a great way to practice joinery without the pressure of building a 'forever' piece of furniture for the house.
If you find yourself with some leftover material after a build like this, don't just toss it. I’ve actually started a small side-tradition of using my offcuts for quick wins. I wrote about it recently in my guide on The 4-Hour Gift: 5 Quick Woodworking Projects Using Only Scrap Wood, which is a great way to clear out the 'bin of shame' I mentioned earlier. It’s much more productive than letting the scrap pile grow until you trip over it again.
Observations from the Garage Floor
- Mobility is Freedom: In a small garage, if it doesn't have wheels, it's a liability. Every major tool I own is now on some form of mobile base.
- Plan for the Car: If you share a garage with a spouse who expects to park inside, always design your shop furniture to 'nest.' My cart is designed to tuck under the wing of my miter saw station.
- Digital Assets Matter: Having access to a massive library like Teds Woodworking (all 16,000 plans of it) is less about following every instruction perfectly and more about having a reference architecture. I rarely build exactly what's on the page, but I always use the structural logic as my baseline.
- The 1/8-inch Rule: Always, always account for the kerf. I’ve probably wasted a full 4-foot by 8-foot sheet of plywood over the years just by forgetting that the blade itself takes up space.
The cart isn’t just a piece of utility furniture; it was the moment I stopped being just a guy with a pile of wood and started being someone who understands how a shop actually functions. It’s about the workflow, the efficiency, and the ability to move things out of the way so your wife doesn't have to scrape frost off her windshield in January. That, more than any dovetail joint, is a successful project in my book.