Late last August, I reached a breaking point. I was in my garage on one of those humid Minnesota mornings where the air feels like a damp wool blanket, trying to reach my table saw to rip a piece of walnut. Instead, I tripped over the handle of my snowblower and sent a stack of plastic garden pots cascading across the floor. My 'half-garage' workshop was officially losing the war against lawn equipment. I realized that if I didn't get the mower, the blower, and the bags of mulch out of the workspace, my woodworking hobby was going to be relegated to whatever I could fit on a TV tray in the living room.
The solution was obvious: a lean-to shed. It’s the classic IT approach to storage—adding a sidecar to the main server. I needed something that could hug the side of the house, handle our brutal winters, and, most importantly, be something I could build without accidentally compromising the structural integrity of our home. I'm a project manager by day, which means I'm great at making spreadsheets but occasionally prone to 'feature creep' in the workshop. I knew I needed a solid set of plans to keep me from turning a simple storage box into a two-story guest house.
The Search for a Roadmap and the Foundation Struggle
I spent a few nights filtering through a database called My Shed Plans, looking for something labeled 'beginner-friendly' but sturdy. I wasn't looking to reinvent the wheel; I just wanted a design that wouldn't fall over when the first North wind hit. Once I settled on a 4x8 lean-to design, the reality of the work set in. One humid Saturday morning, I found myself in the side yard with a shovel, clearing a patch of dirt that had previously only hosted weeds and a few forgotten tennis balls.
In Minnesota, you can't just throw a shed on the grass and hope for the best. The frost line here is no joke, typically ranging from 42 to 60 inches deep. While I wasn't about to dig four-foot piers for a small shed, I did have to deal with the ground heave. I opted for a leveled gravel bed, which sounds simple until you’re three hours into hauling bags of crushed rock while your wife watches skeptically from the kitchen window, likely wondering if this is going to be another 'lopsided bookshelf' incident.
For the base, I used UC4A pressure-treated lumber. For those who don't spend their lunch breaks reading the American Wood Protection Association standards, UC4A is the rating for ground contact. It’s the heavy stuff. There is a very specific, heavy, metallic thud that a framing hammer makes when it drives a 16-penny nail into wet UC4A pressure-treated pine on a quiet Sunday morning. It’s a satisfying, industrial sound that tells the neighborhood you’re actually doing something, even if you’ve spent the last hour just staring at a level.
The Critical Mistake: To Bolt or Not to Bolt?
The biggest decision in any lean-to project is how to handle the 'lean' part. Most online tutorials tell you to bolt a ledger board directly to your house’s rim joist. I almost did it. I had the lag bolts in my hand. But then I started thinking about the 'dependencies'—a habit from my day job. Bolting a shed directly to your house siding is a high-risk move. It often voids home insurance policies because you're piercing the building's envelope, and it creates a perfect trap for moisture. If water gets behind that ledger board, you’re looking at an expensive date with a rot-remediation specialist in five years.
I decided to build mine as a 'freestanding' lean-to. It sits about an inch away from the house, tucked right under the eaves. This allows for airflow and ensures I’m not anchoring my DIY mistakes to the foundation of my largest asset. It’s a bit more work because you need four corner posts instead of just two, but the peace of mind is worth the extra few 4x4s. Plus, it meant I didn't have to cut into my vinyl siding, which is a task I’m about as comfortable with as I am with performing open-heart surgery.
Framing and the 'Off-by-One' Error
Once the base was square—or 'suburban square,' which means within a quarter-inch—I started the framing. I stuck to the standard stud spacing of 16 inches on center. This is the International Residential Code standard for a reason; it makes everything from siding to interior shelving much easier to align later. Framing is where my IT brain really kicks in. It’s all logic and repeatable patterns until you hit a corner and realize you didn't account for the thickness of the adjoining wall.
I was making good progress over a long holiday weekend until I got to the roof rafters. I spent twenty minutes staring at a three-quarter inch gap in my roof rafters because I measured from the wrong side of my pencil mark—a classic 'off-by-one' error that would have crashed any script I’ve ever written. In coding, you just delete the line. In woodworking, you have a very expensive piece of scrap wood and a bruised ego. I had to step back, take a breath, and re-cut the birdsmouth joints. It was a humbling reminder that 'measure twice, cut once' isn't just a cliché; it's a survival strategy.
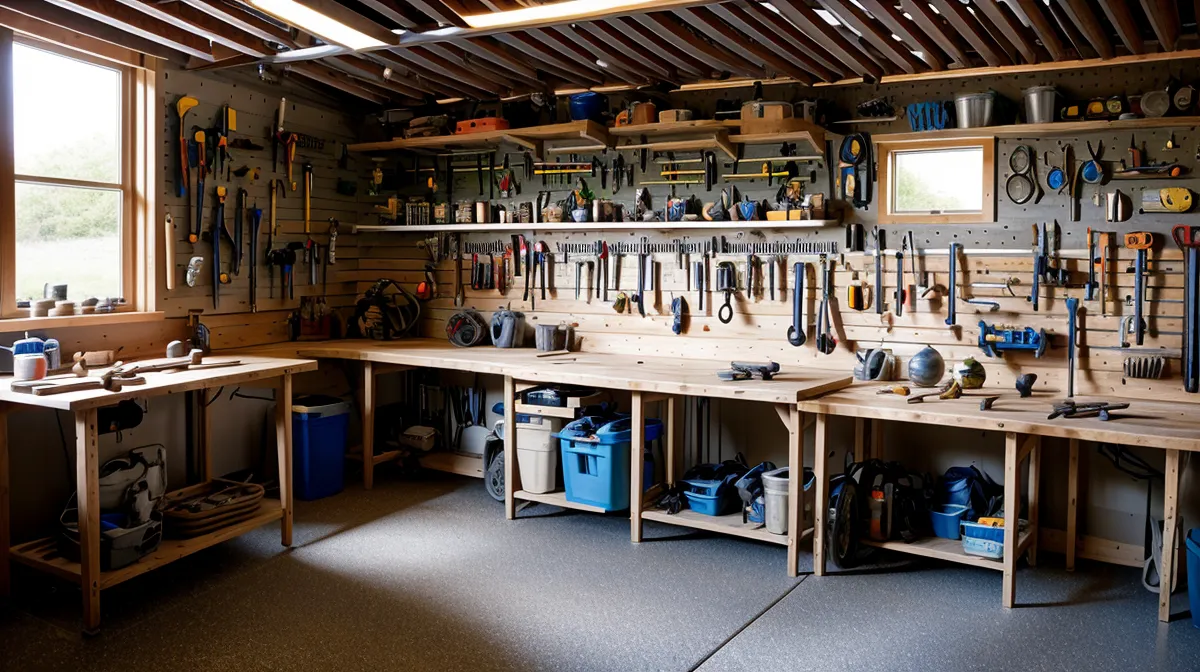
During the framing phase, I realized how much I missed having my tools organized. I kept having to run back into the garage to find my square or my impact driver. It reminded me of when I was building a DIY woodworking clamp rack for a small garage shop; everything is easier when you aren't hunting for the basic components of your build. I ended up setting up a temporary station outside just to keep my sanity intact.
The Roof Pitch and the Panic Moment
The turning point of the project came when I realized my house siding wasn't as plumb as I thought. When you're building something that’s supposed to sit parallel to a wall, any lean in that wall becomes glaringly obvious. As I was trying to set the roof pitch, I realized the shed was looking slightly 'drunk' compared to the house line. I had a moment of genuine panic where I thought I’d have to tear the whole thing down and start over.
Instead of winging it, I actually went back to the troubleshooting section of the plans. I ended up using some shims at the base and slightly adjusting the rafter overhang to create an optical illusion of perfect alignment. It’s basically the woodworking equivalent of 'fixing it in post-production.' I used my miter saw for all the compound cuts on the rafters, which made me glad I took the time to set up my shop properly. If you're doing a lot of these cuts, I highly recommend building a DIY miter saw station to give yourself the support needed for long boards.
Final Reflections Under the November Sky
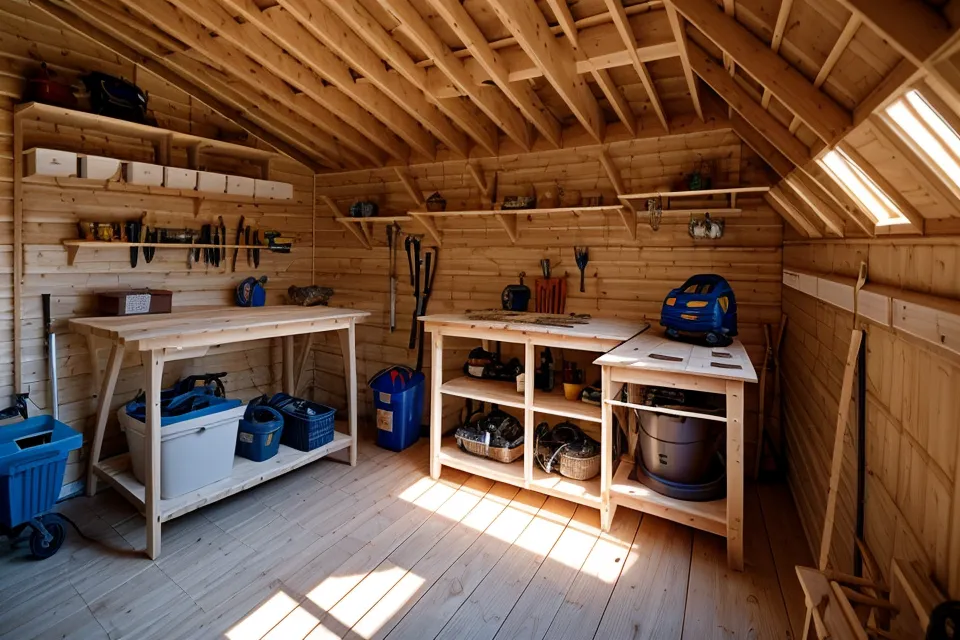
The project wrapped up in early November, just as the first real chill started hitting the Twin Cities. I managed to get the cedar siding stained and the roofing shingles on just before the first snowfall. Seeing that first dusting of white hitting the finished roof while my snowblower sat dry and protected inside the shed was one of the most satisfying moments of my 'weekend warrior' career. The garage was finally clear, and I could actually see the floor of my workshop again.
Building a lean-to isn't about achieving architectural perfection. It’s about solving a problem with your own two hands and a few weekends of sweat. I made mistakes—the rafter gap and the leveling panic being the highlights—but the shed is still standing, and more importantly, my wife actually lets guests see it. It’s not just a storage box; it’s a monument to the fact that even an IT guy with a YouTube addiction can build something that survives a Minnesota winter. Now, if I could just figure out where I put my favorite chisel in all that newly cleared space, I’d be all set.